In this project we will install the Arduino IDE programming environment and create a simple web site on a ESP8266 device. We will setup the web site initially as a stand alone hot-spot and then incorporate it onto our local WiFi network.
The first step is to download and install the Arduino IDE. This can be found at https://www.arduino.cc/en/Main/Software. Once you have installed the software and run the software you should see the following. If you are new to Arduino this link will help you get started. https://www.arduino.cc/en/Guide
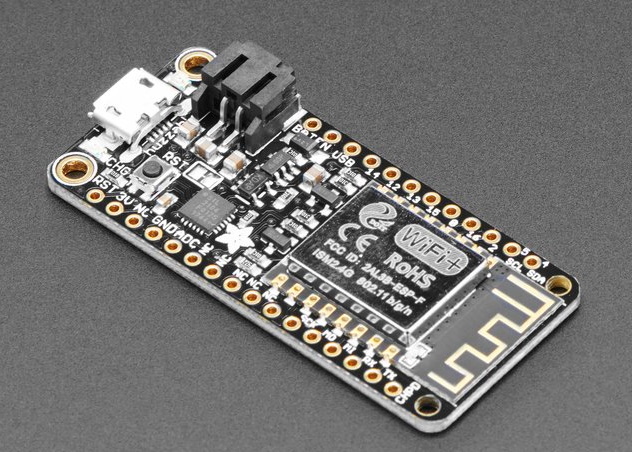
Next We need to setup the device we are using. For these examples and future projects I’ll be using the Adafruit Feather HUZZAH ESP8266 shown below. You can run this device straight from your computer USB connection. More information can be found at https://learn.adafruit.com/adafruit-feather-huzzah-esp8266/downloads

Select device from Tools->Board.
Lets add some code to setup a hot-spot
#include <ESP8266WebServer.h>
ESP8266WebServer _webserver(80);
/* Configuration Variables for the AP name and IP. */
const char *ssid = "MyFirstAccessPoint";
const char *password = "password";
IPAddress _local_IP(192,168,2,1);
IPAddress _gateway(192,168,2,254);
IPAddress _subnet(255,255,255,0);
const char index_html[] PROGMEM = R"rawliteral(
<!DOCTYPE HTML>
<html>
<head>
</head>
<body>
<div style = "background-color: cornflowerblue;" >
<br/>
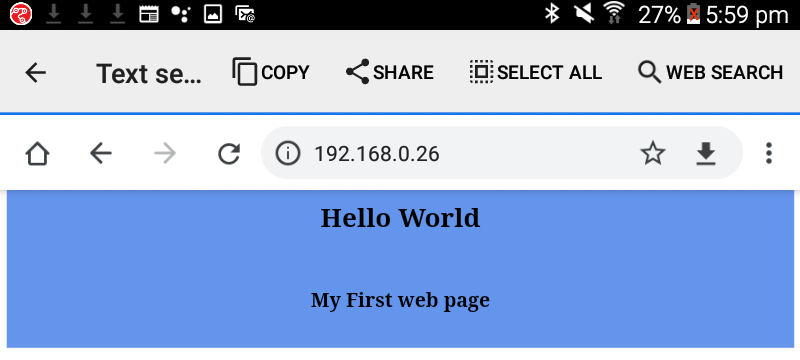
<h1 style="text-align: center;">Hello World</h1><br/>
<h2 style="text-align: center;">My First web page</h2>
<br/>
</div>
</body>
</html>
)rawliteral";
void setup() {
// put your setup code here, to run once:
delay(1000);
Serial.begin(115200);//Starting serial comunication
Serial.println();
Serial.print("Seting up access point...");
WiFi.softAPConfig(_local_IP,_gateway,_subnet);
WiFi.softAP(ssid, password);
Serial.print("IP address = ");
Serial.println(WiFi.softAPIP());
//Configuring the web server
_webserver.on("/", handleIndex);
_webserver.onNotFound(handleNotFound);
_webserver.begin();
}
void loop() {
// put your main code here, to run repeatedly:
_webserver.handleClient();//Checks for web server activity
}
void handleIndex()
{
Serial.println("Index received");
_webserver.send(200, "text/html", index_html);
}
void handleNotFound()
{
String message = "File Not Found\n";
_webserver.send(404, "text/plain", message);
}
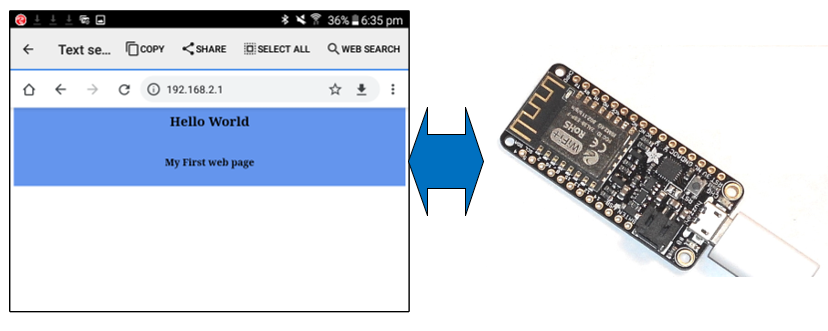
The code starts a hot-spot called “MyFirstAccessPoint” with a password of “password” on an address of 192.168.2.1. Run the code and connect to the hot-spot using your computer/phone or tablet then browse to http://192.168.2.1.

The first section of code sets up the the local setting for the hot-spot. We then setup the web site HTML code as a rawliteral string constant. This allows us to embed the web site code directly into program memory without formatting into strings. The setup code configures the access point and web page and provides functions to handle the index page and not found cases.
Connecting to your local wi-fi network and displaying the page.
Create a new project and add the following code.
#include <ESP8266WebServer.h>

ESP8266WebServer _webserver(80);
/* Configuration Variables for the AP name and IP. */
const char *ssid = "your network ssid";
const char *password = "your network password";


const char index_html[] PROGMEM = R"rawliteral(
<!DOCTYPE HTML>
<html>
<head>

</head>
<body>
<div style = "background-color: cornflowerblue;" >
    <br/>
  <h1 style="text-align: center;">Hello World</h1><br/>
  <h2 style="text-align: center;">My First web page</h2>
  <br/>
  </div>
</body>
</html>
)rawliteral";

void setup() {
  // put your setup code here, to run once:
   delay(1000);
  Serial.begin(115200);//Starting serial communication
  Serial.println();
  WiFi.begin(ssid, password);             // Connect to your local wi-fi network
  Serial.print("Connecting to ");
  Serial.println(ssid);

 while (WiFi.status() != WL_CONNECTED)
 {
   delay(200);
   Serial.print(".");
 }
  Serial.println();
  Serial.print("Connected on IP address");
  Serial.println(WiFi.localIP()); //The ip address on your local computer

    //Configuring the web server
  _webserver.on("/", handleIndex);
  _webserver.onNotFound(handleNotFound);
  _webserver.begin();
  Serial.print("Web Server configured");


}

void loop() {
  // put your main code here, to run repeatedly:
  _webserver.handleClient();//Checks for web server activity


}

void handleIndex()
{
  Serial.println("Index received");
  _webserver.send(200, "text/html", index_html);
}

void  handleNotFound()
{
    String message = "File Not Found\n";
    _webserver.send(404, "text/plain", message);
}
The code now connects to you a local area network using the ssid and password in the configuration section. Once the connection is established the web site is started.
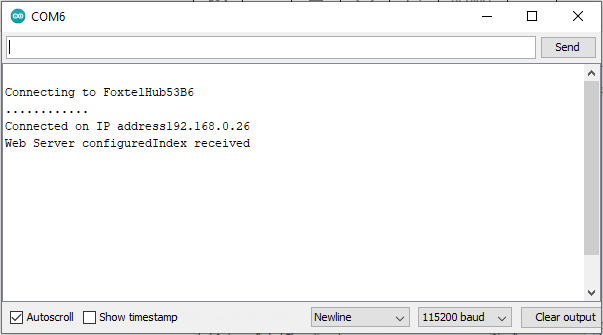
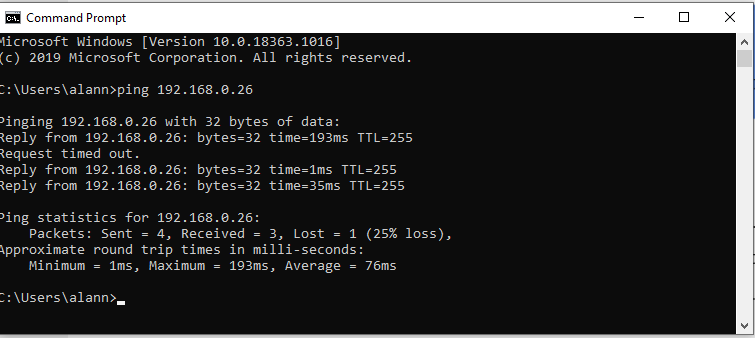
Finally reconnect you tablet to your network and browse to the address shown in the terminal screen , in my case 192.168.0.26
Summary
We have shown how we utilise the ESP8266 to host a hot-spot and to connect to a WiFi network network and present a basic website. We will be using both these techniques in following posts. Hard coding the credentials and IP settings is not very practical if are you building more that one application for your home network and we certainly don’t want to sign into individual hot-spots to access each device. In the following posts we will build a settings page operating as a hot-spot to configure the device and then run it on our local network. We will save these settings in the flash memory of the device and reboot onto the local network.